Running the program
Before moving on to more examples, we will cover the basic steps to build and run a program on the Raspberry Pi Pico (RP2040).
These commands are run from the project directory. This section is included once to avoid repeating the same steps in later chapters. If you have not created a project yet, start with the Quick Start section.
Build and Run
The RP2040 uses dual-core Arm Cortex-M0+ processors. Programs are built using the thumbv6m-none-eabi target.
Build the program:
# build the program
cargo build
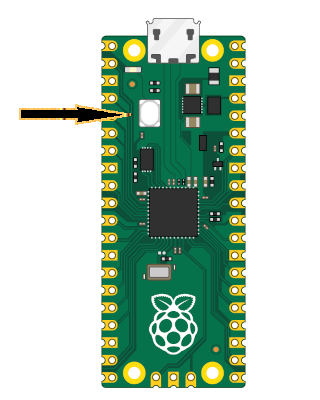
To flash your application onto the Pico, press and hold the BOOTSEL button. While holding it, connect the Pico to your computer using a micro USB cable. You can release the button once the USB cable is connected.
# Run the program
cargo run
Note
The example codes include a runner configuration in the
.cargo/config.tomlfile, defined as:runner = "picotool load -u -v -x -t elf". This means that when you executecargo run, it actually invokes thepicotoolwith theloadsubcommand to flash the program.
With Debug Probe
When using a Debug Probe, you can flash your program directly onto the Pico with:
# cargo flash --chip RP2040
cargo flash --chip RP2040 --release
If you want to flash your program and also view its output in real time, use:
# cargo embed --chip RP2040
# cargo embed --chip RP2040 --release
cargo embed --release
cargo-embed is a more advanced version of cargo-flash. It can flash your program, and it can also open an RTT terminal and a GDB server.