Quick Start - Simple LED Blinky on Pico W
If you are using a Pico board without wireless support, you can skip this chapter. This quick start is specific to Raspberry Pi Pico W and focuses on getting a basic LED blink working with Rust.
Pico W LED difference
On the standard Raspberry Pi Pico, the onboard LED is connected directly to RP2040 GPIO 25.
On the Raspberry Pi Pico W, the onboard LED is connected to GPIO 0 of the CYW43439 Wi-Fi chip, not to the RP2040. RP2040 GPIO 25 is used for communication with the wireless chip and is not available for LED control. This change exists to account for the GPIO pins required by the Wi-Fi chip.
Because of this wiring, blinking the onboard LED on Pico W requires:
- Loading firmware onto the CYW43439
- Setting up PIO-based SPI communication between RP2040 and the wireless chip
- Using the cyw43 driver to set the LED state
Wi-Fi itself is not used in this chapter, but the wireless chip must be initialized to control the LED.
CYW43439’s WiFi firmware
The CYW43439 Wi-Fi chip on Pico W requires firmware to operate. This firmware is provided as a prebuilt binary and is not open source.
At runtime, the RP2040 loads the firmware into the CYW43439 over SPI. Until this firmware is loaded, the wireless chip cannot be used, including Wi-Fi and onboard LED control.
Prebuilt firmware blobs used by Rust projects are available here:
https://github.com/embassy-rs/embassy/tree/main/cyw43-firmware
We will be flashing two firmware files. FW is the main executable firmware that runs on the CYW43439 Wi-Fi chip, and CLM (Country Locale Matrix) contains the regulatory data used to enforce country-specific RF rules. Download 43439A0.bin and 43439A0_clm.bin from the repository above.
Loading the firmware
There are two common ways to load the CYW43439 firmware.
The first approach is to flash the firmware separately to fixed addresses in flash memory. This can make development faster, since the firmware does not need to be included in every application build.
Flash the firmware binaries using probe-rs:
probe-rs download 43439A0.bin \
  --binary-format bin \
  --chip RP2040 \
  --base-address 0x10100000

probe-rs download 43439A0_clm.bin \
  --binary-format bin \
  --chip RP2040 \
  --base-address 0x10140000
Access the firmware from Rust:
#![allow(unused)]
fn main() {
let fw = unsafe { core::slice::from_raw_parts(0x1010_0000 as *const u8, 230_321) };
let clm = unsafe { core::slice::from_raw_parts(0x1014_0000 as *const u8, 4_752) };
}
This avoids embedding large firmware blobs into every application build and makes iteration faster.
The second approach is to embed the firmware into the application binary. In this approach, the firmware is included directly in the Rust binary.
#![allow(unused)]
fn main() {
let fw: &[u8] = include_bytes!("../firmware/43439A0.bin");
let clm: &[u8] = include_bytes!("../firmware/43439A0_clm.bin");
}
This produces a self-contained binary but increases flash usage and rebuild time.
For now, I will use the second approach. I will download the firmware files, place them in the firmware directory at the root of the project, and load them using include_bytes! as shown above.
The code snippet
In this section, we blink the onboard LED on Pico W. To do this, the wireless chip must be initialized and kept running in the background. This involves interrupt binding and a background task; do not worry about these for now, they will be explained later.
Note
As you can see in the code, RP2040 GPIO 25 is used as the SPI chip-select pin for the CYW43439 Wi-Fi chip, not for the onboard LED.
bind_interrupts!(struct Irqs {
    PIO0_IRQ_0 => InterruptHandler<PIO0>;
});

#[embassy_executor::task]
async fn cyw43_task(
    runner: cyw43::Runner<'static, Output<'static>, PioSpi<'static, PIO0, 0, DMA_CH0>>,
) -> ! {
    runner.run().await
}

#[embassy_executor::main]
async fn main(spawner: Spawner) {
    let p = embassy_rp::init(Default::default());

    let fw: &[u8] = include_bytes!("../firmware/43439A0.bin");
    let clm: &[u8] = include_bytes!("../firmware/43439A0_clm.bin");


    let pwr = Output::new(p.PIN_23, Level::Low);
    let cs = Output::new(p.PIN_25, Level::High);

    let mut pio = Pio::new(p.PIO0, Irqs);
    let spi = PioSpi::new(
        &mut pio.common,
        pio.sm0,
        DEFAULT_CLOCK_DIVIDER,
        pio.irq0,
        cs,
        p.PIN_24,
        p.PIN_29,
        p.DMA_CH0,
    );

    static STATE: StaticCell<cyw43::State> = StaticCell::new();
    let state = STATE.init(cyw43::State::new());
    let (_net_device, mut control, runner) = cyw43::new(state, pwr, spi, fw).await;

    unwrap!(spawner.spawn(cyw43_task(runner)));

    control.init(clm).await;
    control
        .set_power_management(cyw43::PowerManagementMode::PowerSave)
        .await;

    let delay = Duration::from_secs(1);
    loop {
        info!("led on!");
        control.gpio_set(0, true).await;
        Timer::after(delay).await;

        info!("led off!");
        control.gpio_set(0, false).await;
        Timer::after(delay).await;
    }
}
The goal of this chapter is simply to blink the onboard LED and get familiar with flashing code and seeing it run on the hardware. Do not worry if you do not understand all parts of the code yet; we will explain them later.
Clone the Quick start project
git clone https://github.com/ImplFerris/pico-w-quick
cd pico-w-quick
How to Run?
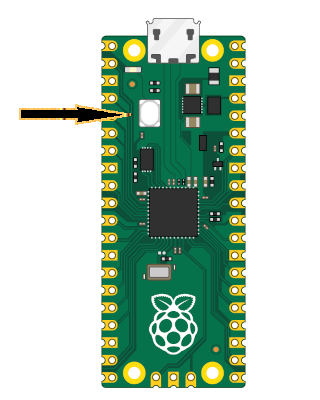
To Flash your application onto the Pico, press and hold the BOOTSEL button. While holding it, connect the Pico to your computer using a micro USB cable. You can release the button once the USB is plugged in.
# Run the program
cargo run
This will flash (write) our program into the Pico’s memory and run it automatically. If successful, you should see the onboard LED blinking at regular intervals. If you encounter any errors, verify that you have set up your development environment correctly and connected the Pico properly. If you’re still unable to resolve the issue, please raise a GitHub issue with details so i can update and improve this guide
With Debug Probe
If you’re using a debug probe, you don’t need to press the BOOTSEL button. You can just run cargo flash or cargo embed instead. These commands are covered in detail later in the book, though you can jump ahead to the Debug Probe chapter if you’d like to explore them now.